Spelling, sound walls, and sound chains, OH MY!

Have you ever wondered why your students misspell words (e.g., sgin for the word skin)? In the past, I may have required my students to practice writing the word(s) they misspelled 5x each (or more). Yikes!
Now I know that sometimes students make spelling errors because of the way they perceive (or don’t perceive) the phonemes in a word. In the case of sgin/skin, the word skin has an unvoiced stop phoneme in the second position of a blend: /k/. That causes the stop phoneme to be deaspirated a bit (it doesn’t pack the same punch as it would if it were in the initial position of the word).
Try this: hold a tissue in front of your face and say the word kin. Now hold the tissue in front of your face and say the word skin. Did you notice that the tissue moves more when you say kin? That is because the stop phoneme is at the beginning of the word, so the puff of air to produce /k/ is very distinct whereas when you say skin, the puff of air is deaspirated. Because of this deaspiration, some students actually perceive the unvoiced stop sound to be the voiced brother pair /g/, which is why they try to represent it with the letter ‘g’ in the word skin.


This student does not need to write the word skin a million times to commit it to memory. We first need to ensure they can perceive the correct speech sound(s) as they segment and blend the phonemes in the word. If they make common confusions like voiced/unvoiced, we can have them place their hands on their vocal cords or over their ears to differentiate between those two phonemes.
You can also use your sound walls to help you design targeted phonemic awareness activities based on common confusions you observe in your students’ speech, reading, and spelling. Say your students consistently confuse the voiced/unvoiced stop sounds (e.g., they misspell sdard for start; sdob for stop; sbord for sport; kig for kick). Using the steps below, we can create a sound chain to help students differentiate between voiced/unvoiced stop phonemes.
Making a Sound Chain
Step 1: Make note of the phonemes students may confuse due to similarities in place and manner of articulation on your consonant and/or vowel phoneme planning charts.
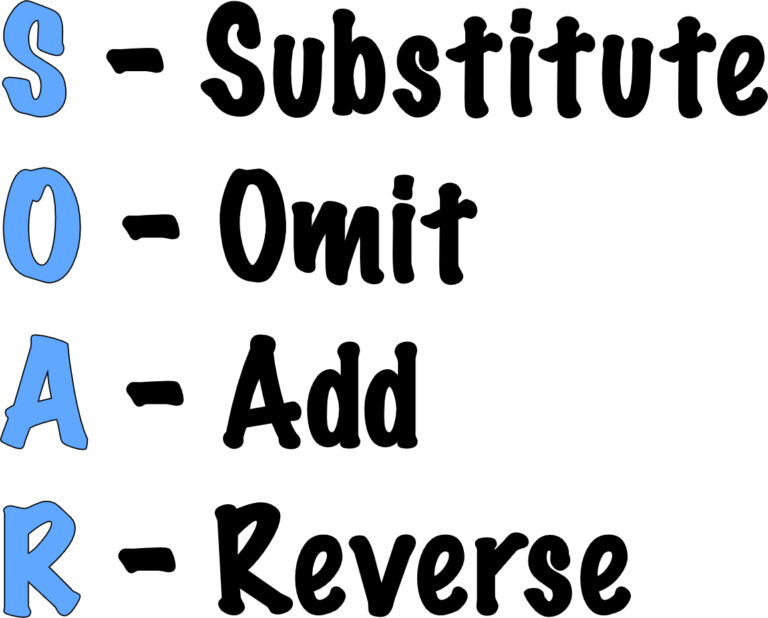
Step 2: Use the acronym SOAR to guide you in creating your sound chain. Remember to only change one phoneme at a time.
Example: port, sport, spot, pot, pit, spit, skit, sit, set, sep, step, stop, top, tap, cap, kip, kin, skin, scan, scat, stat, tat, tut, tud, stud, stum, stung, stun, nuts
Scaffold: Use manipulatives with Elkonin boxes or kinemes (small gestures/movements like finger-tapping) to help students recognize phonemes in words. These objects or movements can help them mark each phoneme in a word and show which phoneme needs to be changed in the sound chain. If you are creating sound chains for spelling, use letter tiles as manipulatives to help students reflect changes.
Step 3: If/when students confuse phonemes during the word-building process, point them back to the sound wall, and take time to discuss the place/manner of articulation of the phonemes.
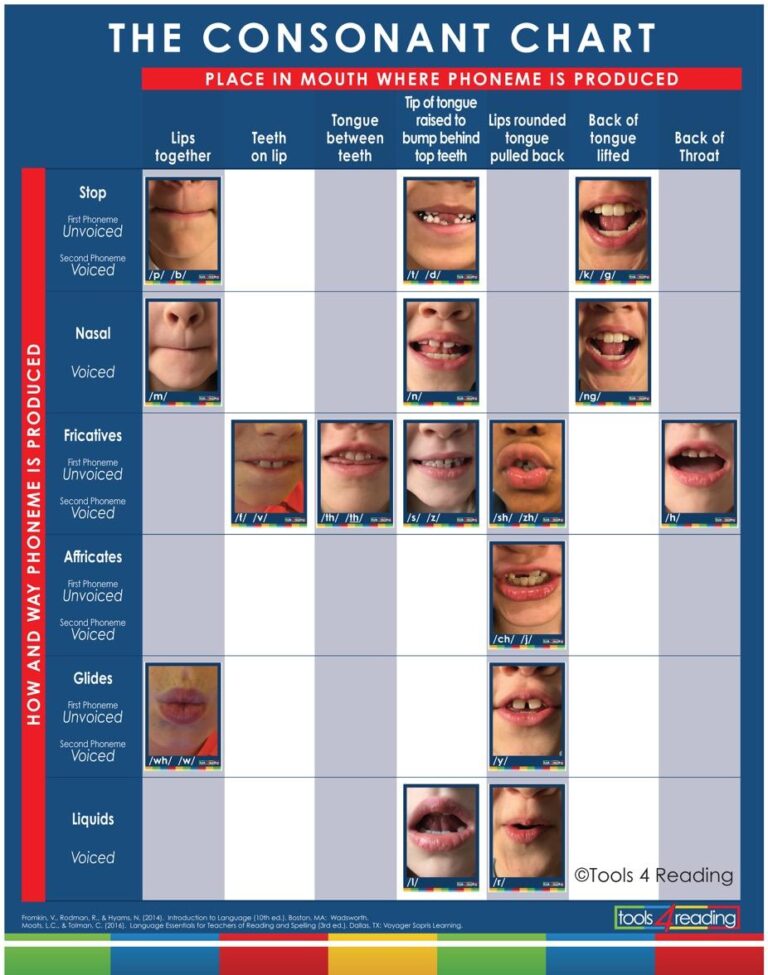

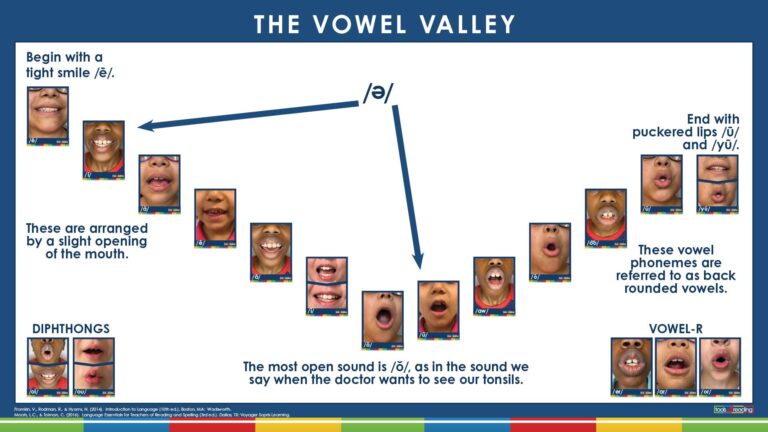

Your students’ spelling errors may not always stem from a phonological confusion. However, you can use your sound walls and information provided in your Kid Lips™ Instructional Guide to give you insight into how your students are processing language. If you see that your students are making common mistakes with voiced/unvoiced phonemes, you can call their attention to the articulatory gestures of each to provide specific feedback and targeted practice that can help them differentiate between phonemes in the future as they speak, read, and write.


